

I needed to declutter the top of my dresser AND my jewelry box, so made this neat-o earring hanger to hang above my dresser. It was a super-easy project - wanna know how I did it? Read on...

What you need:
- A sheet of stamped metal from your local Hardware store. I bought a large sheet from Lowes for about $25, and have plans for the rest of it!
- 8"x10" (or larger) picture frame - with the glass and back removed. Mine came from Restore for $2 and got a coat of black spray paint.
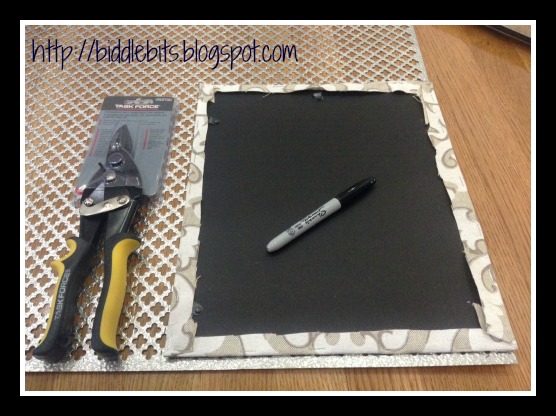
- Metal snips I bought them for $8 from Lowes. I'd recommend buying a pair with longish handles - makes it easier to cut the metal without the hurting your hands.
- Hot glue gun
- optional: ribbon - for hanging the frame on your wall

Instructions:
Step #1: Using a Sharpie marker, outline the backing of the picture frame onto the sheet metal. Put paper/cardboard underneath your work area, so you don't get sharpie marker on your surface.
Step #2: Cut out the rectangle, using your metal snips
Step #3: Insert cut metal into the back of the picture frame. If it doesn't fit perfectly, trim the metal with your metal snips.

Step #4: Using your hot glue gun, run a straight line of hot-glue along the edges where the metal meets the wooden frame.
*Note: I originally tried a staple gun to staple the metal to the frame, but the staples were too long, and ended up coming through to the front of the frame.

Step #5: Turn the frame over, hang your favorite earrings, and you're DONE!
An optional step is to hot glue ribbon to the top-back corners of the frame, so you could hang it on a wall. Mine is leaning up against my wall, so no ribbon needed :)
There you go! Super easy and super-cute way to organize my favorite earrings.
ENJOY!


No comments:
Post a Comment