About Me

My photo
Welcome to Biddle Bits! My name is Sarah & I believe that *anyone* can create amazing things, if you just work on them one step at a time.
Powered by Blogger.

Friday, December 28, 2012

Homemade Gardener's hand scrub


Hi everyone! I hope you had a magical hanukkah, Christmas, Winter Solstice, Kwanzaa, (did I cover my bases?)...and that you're looking forward to a fantastic 2013! Apologies for being absent for quite awhile - the holidays and associated travel (and planning) took me away from the blog for a few weeks. But, I'm back with lots of BiddleBits project ideas for the coming year!

Today's project was a holiday gift I've been wanting to make for awhile - and it would make an ideal Valentine's day or Mother's Day gift for friends, neighbors, you Mom, or teachers. It's a pretty light-pink color AND, it's easy-peasy.


Ingredients:
  • Dawn "hand-renewal" liquid dishwashing detergent
  • sugar
  • plastic or glass container with a tight-seal top
Instructions:

Step #1: Take each of your empty plastic/glass containers and fill them a little more than 3/4 of the way with sugar. Then, dump the sugar into a larger bowl.

Step #2: Add the liquid detergent to the bowl of sugar, a bit at a time, mixing with a spatula. The amount you use will depend on the amount of hand scrub you're making. Keep adding the liquid detergent until all the sugar is covered, mixed well, and is a little wetter than a paste.


Step #3: Using your spatula, spoon into your container and seal tightly
Step #4: Tie with an optional ribbon, if you'd like!
Step #5: (optional) You may want to include instructions:
  • Scoop a small handful into your hands, and rub all over your hands and between fingers
  • Rinse with water
Your hands will be super-soft, and if you've been gardening, the scrub is tough-enough to get the dirt from under your fingernails and from between your fingers!


Tuesday, December 4, 2012

Holiday decor using a recycled cabinet door


My sweet hubby went to the Raleigh Habitat for Humanity ReStore earlier this year, and brought home a trunk-load of various sized cabinet doors for $1-$2 each. I can't remember how we originally intended to use them (not as cabinet doors...), but as I was looking through our stash of wood scraps, an idea hit me. I could use one as a "large wood scrap" for a holiday sign I'd been wanting to make.

Sadly, I've *somehow* misplaced most of my "in-progress" pictures, so please forgive me as I describe the process, for the first time, with out many pictures!!

The previous owners of our home left several paint gallons in our garage - one color was Sherwin Williams "Poinsettia", which is about the reddest-red I've ever seen! It said "living room" on top of the never-opened lid, which means that I *think* they had intended to paint our living room Christmas red! (holy smokes...I'm glad they didn't...this paint is SO red!)

What you need for this project:
  • cabinet door
  • paint  - your color choice - I chose red
  • 1.5-2" paint brush
  • Small paintbrush - like the kind you did "paint-by-number" with as a child
  • white acrylic paint - or your color choice
  • black sharpie market
  • medium grit-sandpaper (optional - to give it a more rustic look)
  • polyurethane (optional)
How-to instructions:

Step #1: Take a wet washcloth and (in my case) clean the garage-grime off the door, then wipe it dry. Paint the whole cabinet face and edges with the red paint. Let it dry, then paint a second coat. Let dry.

Step #2: While the paint is drying, decide what word you want to print on your sign. I chose "joy". In Microsoft Word, I typed JOY into a word doc (font = Cambria), then enlarged the font to 770. Each letter took up *most* of an 8.5x11" piece of paper. Print it out. (Note that if you're working with a smaller cabinet door, you'll need to adjust the size of your letters to make them fit).

Step #3: Using an Exacto knife (or scissors), cut out each letter.

Step #4: Make sure the red paint is dry, then lay your letters out on the cabinet door to make sure they fit. Making sure they're spaced evenly apart and centered, trace the letters onto the door using a pencil or pen.

Step #5: Using white acrylic paint and a small paint brush, begin outlining and filling in each letter, being careful to keep your edges as neat as possible. Let dry. Do a second coat of white paint. Let dry.

Step #6: Once the white paint is completely dry, take a black sharpie marker and outline your letters. This is optional, but gives a nice definition to your letters, and cleans up any not-so-perfect letters you may have.

Step #7: Taking medium-grit sandpaper (I used 120), rough up the edges of the cabinet door. I also chose to rough up the letters a little - to make it look more rustic and authentic. *Just be sure the paint is completely dry...otherwise the sandpaper will smudge the wet paint = not pretty. (I tried the orbital sander, as seen in the picture below - it was too powerful for the look I was going for, but if you want a *really* distressed look, try a similar sander!)

Using the orbital sander...

Roughing up the letters...

Look how rustic and charming it turned out!
 
Step #8: You may choose to spray a coat of polyurethane as a finishing touch, especially if you want to display this outdoors. We're only displaying ours indoors, so I skipped the poly.

Step #9: Put your beautiful work on display! I think ours will live above our mantel this Christmas season.


Who's ready to make one??

Tuesday, November 27, 2012

"Glitter on the inside" ornaments


These are definitely the most beautiful Christmas ornaments I've ever seen! (and that's saying a lot from this gal, who *LOVES* Christmas)
The lights on our Christmas tree reflect the glitter and glass gorgeously, and our tree sparkles from every angle.
 
These are easy as PIE - from start to finish, it probably took me 30 minutes
(excluding dry-time) ...and 10 of those minutes I fussed over the bows.
 
Here's what you need:
  • Liquid floor cleaner - I bought the cheapest I could find: $2.50 at Walmart
  • Assorted glitter - any colors you choose
  • glass ball ornaments - purchased at Michaels for just over $2 for 6 ornaments 
  • ribbon (optional - I bought mine at Walmart for 60% off after Xmas last year)
 
 
Step #1: Take the silver tops off of each glass ornament, and pour a small amount of floor cleaner into the ornament. Swirl it around, so the liquid cleaner covers every inch of the ornament's insides. Pour the remaining cleaner down the drain (or back into the original bottle).
 
Step #2: Pour glitter into the ornament and swirl around until evenly coated. It actually took quite a bit of glitter to cover inside! Then pour remaining glitter back out onto a paper towel to use for your next ornament.


Step #3: Set aside and let dry for a few hours.
 
Step #4: Replace silver caps and top with an optional ribbon bow. (I hot glued the ribbons to the silver ornament tops). With *or* without a bow, these are stunning ornaments! AND, the bonus is that there isn't a glittery mess when you're packing/unpacking your ornaments each year!
 

In my 2 favorite ornaments, I mixed gold and silver glitter ahead of time, then poured into the ornament and swirled around. It made this amazing platinum color! You can see them in the picture below...the 2 ornaments with the green bows. (The one in the back looks more gold, but you can see the truer platinum color in the front row, below):


What ornaments have you made this year? Care to share how you made them?

Tuesday, November 13, 2012

Homemade Vanilla Extract


Some of my favorite memories from growing up include baking...whether it was pumpkin-shaped sugar cookies at Halloween, birthday cupcakes, Christmas cookies,... you name it. One of the most important ingredients in baking (and one of the most comforting scents to me) is Vanilla.

I found this recipe from pennies on a platter, for homemade vanilla extract last year and saved it as a "favorite" (before the days of Pinterest!), knowing that I wanted to make a batch of it for this year's Christmas. I've used imitation extract before, but it's just *not* the same as the *real deal*! (real deal = vanilla made with real vanilla beans, rather than the imitation chemical stuff).

I ordered Premium Bourbon-Madagascar Vanilla beans from her suggested amazon website - they're very reasonably priced, and have free shipping! Then, I did a search for the 4oz Amber Boston Round Glass Bottles to find the best price possible and ordered 12 of those as well.

Here are the ingredients you'll need:
  • 750mL bottle of vodka
  • 9 vanilla bean pods
  • printer sticker paper (optional, for labels)
  • Amber Boston Round Glass Bottles - 4 oz size
  • funnel (optional - to help pour vodka into 4 oz bottles)
 
Check out the easy-peasy instructions on penniseonaplatter.com. I followed her directions to a "T"!

She even has cute, printable labels you can use for your bottles!
(Though, I chose a different free printable label, that's more my style, here.)

 
vanilla beans
vanilla beans, but in half vertically and horizontally
Put 6 cut pieces of vanilla bean in each 4 oz bottle
Fill each 4oz bottle with vodka
Print labels on sticker paper, cut out them out, and stick to bottle!
The whole batch...awaiting further instruction :)
"Packaging" supplies: jute rope, a hole punch and printed instructions
I wrapped some thin jute rope around the bottle, then knotted it
and added a "ready to use" date and ingredients

  
Friends: If you happen to be reading this, guess what you're getting for Christmas??!!
Happy Holiday Baking friends!!

Tuesday, November 6, 2012

DIY snow candles


I love snow days, and unfortunately, we don't get very many of them here in the middle of NC! While my job  *does* allow for snow days, the hubs HAS to go into work when the weather goes south. Even still, I dream of a big winter storm, where we're snowed in (with heat and power, of course!), can snuggle on the couch, sip hot chocolate, then head outside to build a snowman and skate on our ice-covered cul-de-sac.

A girl can dream, right?

In the meantime, a more likely place to find snow is on our kitchen table...tonight!
I've seen these "snow candles" in stores around town, and figured I could make my own.
Here's how I did it:

What you need for this project:

  • wax candles, any size
  • mod podge or elmer's glue
  • epsom salts
  • foam paint brush
  • paper towels

Instructions:

Step #1: Pour a layer of epsom salts onto a paper towel.

Step #2: Using your foam brush, brush a light layer of mod podge all around the outside of your candle.


Step #3: While the modge podge is still wet, roll your candle in the epsom salts, completely covering the sides of the candle.


Step #4:  Then, sit on a paper towel to air dry.


 We received this iron candle holder as a housewarming gift, which is a great centerpiece for holiday decorating...fill it with Easter eggs at Easter, mini pumpkins for Halloween/Thanksgiving, and Christmas ornaments for Christmas! 

Time to snow-ify these candles!!

before...

after! (After-thought: I plan to tie some ribbon on the stems below each candle...)


This was a super-simple project!
Try it and let me know what you think!


Friday, October 26, 2012

Plastic Spoon Flowers!


I am incredible surprised by this Pinterest project...what started out as a terrible, ugly mess of conjoined plastic spoons, turned into a beautiful work of art! When all's said and done, it looks like a flower made of glass.

Wanna try one at home? Here you go:

What you need for this project:
  • a box of plastic spoons, any color will work
  • candle
  • scissors
  • primer and spray paint - if you want to change the color of your flower afterwards!
  • a wee-bit of patience
Instructions:

Step #1: Carefully wave the plastic spoon over your flame. I went back and forth quite a few times until the edges start to roll in. Be careful!! Scorching hot plastic = trip to the burn unit if you're not careful!


Step #2: Cut off the handles - leave some of the handle on most of them, as (sorta) seen in the picture below. (you can always cut away more if you want to!). You should wear goggles for this part because spoon handles/plastic shards were flying all over our kitchen. Our cat had a hay-day. (Side note: do cat goggles exist? Eh, he wouldn't stand to wear 'em anyways). Anyhoo...


Step #3: Wash the soot off of the spoons - you'll need to rub 'em a little with your fingers. It doesn't all come off, which is ok b/c the variation in color looks neat on the final-product!

Step #4: Carefully, hold the newly cut, shorter spoon handles over your flame until the "rough" edge gets melty (or catches on fire), and then smush the handles together in groups of three. Hold it with your fingers or a clothespin until the plastic has cooled and set. You'll have to do this one spoon at a time. Be patient, you're forming the base of your flower. This was a little tricky step, so it just takes some practice. Then repeat with each bundle - hold the bundle of spoon handles over your flame until it gets melty (catching on fire is actually beneficial to get sufficient "glue"!) and then smush the handles together to form the entire base of your flower. Hold until cooled and set. Just be careful of the hot, melty plastic, please!


Step #5: At this point in the project, I thought this might be a Pinterest FAIL. In fact, I didn't take a picture of it, because I thought I'd just throw it away! Something told me to keep going...

Now, one-by-one, with the remaining  individual spoons with the shortest handles, or no handles, hold their ends over the flame (catch on fire, then blow out for best adhesion) and carefully fill in some of the empty spaces *on top* of the base, shoving the melty edges into whatever "crevices" need filling/look good! Keep building on top of the base, and fill in the empty spaces until you're left with this beauty!

 
Step #6: optional step, which I haven't tried: I saw a beautiful picture of a plastic-spoon flower, primed with spray primer, then painted with red spray paint, then somehow adhered to a front door-Christmas wreath. I'm not really sure how they adhered it, but I'd imagine lots of hot glue was involved :)
 
This beautiful flower cost me $1.49 - the cost of a box of plastic spoons at Target :)
AND, I have about half-the box of spoons leftover!
Has anyone else attempted to make these? Any helpful tips that I left out?


Tuesday, October 23, 2012

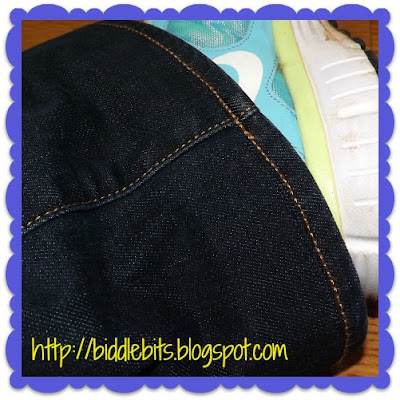
How to hem your jeans like a pro!


While perusing Pinterest last night, I came across a blogger who explains how to hem jeans, keeping the original "edge" of the hem in-tact. Apparently, the same way that alternations to denim are done at Buckle. I was skeptical, but excited to try.

Now, I'm pretty tall, (5'10") so finding jeans that are long *enough* is the usual problem. However, I have one pair of GAP boot cut jeans that are freakishly long...and considering I'm not really a stiletto-heel-wearing-type-of-gal, I figured they were the perfect pair for this little experiment!

First of all, I am AMAZED at how great they look...you honestly can't tell where I hemmed them!! Can you see the line?? Nope? Me neither...

Check out the tutorial here - I followed her directions to a "T", except for these edits:

  • I didn't cut off the excess in the hem (yet...I want to wash them a few times to see if the length shrinks up at all...Nothing's worse than a "flood's coming!" pair of jeans! well...there are worse things, but you get what I'm sayin'...)
  • Once I turned the newly hemmed pants right-side out, I ironed the bottoms of the jeans. Just above the new, barely visible sewing line, I sewed a straight topstitch (the same color as the denim) all the way around the jean's leg. This will keep the bottom of the jeans from rolling up. The color should match so perfectly, you won't be able to see this topstitch...not even up CLOSE!


  •  
     
    Try it and let me know what you think!!!
     

    Sunday, October 21, 2012

    DIY polka-dot flower pots


    My Mom and I went to the Southern Women's Show in Raleigh earlier this year. It turns out that neither of us were too impressed by the booths and vendors there this year, BUT, I did see one cute idea that I've been wanting to recreate - one of the vendors was displaying her work in pebble-filled polka-dot flower pots. Of all the things we saw that day, those flower pots were, by far, the cutest!

    I was in Walmart about a week later, and found simple black plastic flower pots, so I brought 2 of them home with me. My brother and sister-in-law have a vinyl-cutter, so I put in a request for white vinyl-sticker polka dots of varying sizes: 1", 1.5", and 2" in diameter. They brought them during their last visit to NC, and I got right to work in polka-dotting those plastic pots! (If you don't have a vinyl-cutter, and don't know someone who does, you could search for "vinyl polka dots" on etsy.com or elsewhere and easily find someone to make them for you)

    Stuff you need for this project:
    • plastic pot(s)
    • vinyl stickers
    Instructions: (um, this is so easy, detailed steps aren't even really needed here!...but here goes - let me know if you have questions about attaching the vinyl stickers):

    Step #1: Determine how you want to layout your polka dots on the pot.

     
    Step #2: Peel backing from vinyl sticker, and stick on the plastic flower pot. Use a credit card or something similar to rub over the sticker - to make sure it's sticking to the pot.

    This is one of the dots, placed on the flower pot - the white translucent square over it is the "top sheet".
     
    Step #3: Pull the top-sheet off the sticker slowly, making sure it's sticking to the pot. (if it's not sticking, press it back down and go over it a few more times with the credit card.

    Step #4: Repeat Steps 1-3 as many times as needed, to get the look you're going for!


    Until I get around to replanting our pansies in these pots, they're being used as a Halloween candy holder, near our front door!! Pretty cute, huh?


    I think this same idea could be SO cute, using a red flower pot with green and/or white dots, or a green flower pot with red and/or white dots at Christmas! You could fill them with Holiday goodies for your neighbors, or leave it under your Christmas Tree with treats for Santa! ;)